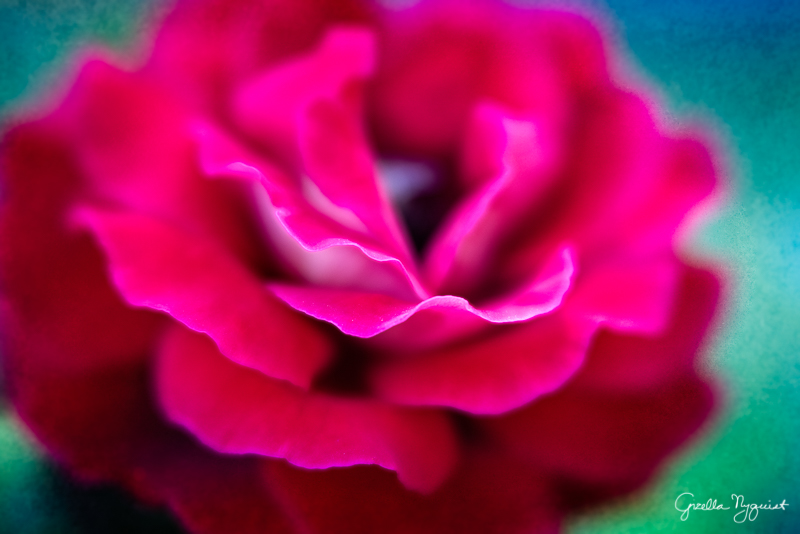
Flowers make me very happy. Their sight and their fragrance make me feel in a way that not a lot of other living or not living things do. I admire their ability to attract my attention as well as of insects, I love how colorful they can be, and how my mood changes positively when I am surrounded with flowers.

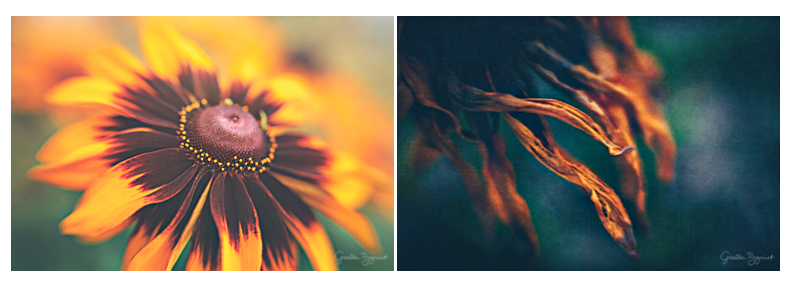
A few weeks back I purchased some annuals for my backyard, including a Denver Daisy. Everything on this flower is very photogenic. It doesn’t matter from which direction I approach this beauty, it almost always gives me wonderful photographic results. In fact, I truly enjoyed their beauty after they passed their prime. It was a different kind of beauty, but I loved it nevertheless.

In order to portray the difference of the live floral beauty and the dead one, I used a slightly different post-processing technique. I created painterly images from all, but I used two kinds of color schemes; a warm palette for the earlier flowers and a much colder and dramatic one for the second set. One image I digitally hand painted. This is a technique that I am currently studying, and this was one of my practice pictures.

Read More

About a week ago a friend of mine asked me if I could demonstrate the different looks various lenses can create of the same subject – including the Burnside. I picked a rose in my brother’s garden for my subject, and used four different lenses: Nikon 35mm, Lensbaby Burnside 35, LB Velvet 56, and LB Sweet 35. Please don’t expect this post to be a complete test of the 4 lenses; my goal was to give a good indication about the various looks you can achieve. I haven’t done any post processing on the following images. I will show a few images from each of the four lenses, then later in the post I’l put them next to each other for an easier comparison.

First, I’d like to show you three images I took with the Nikon 35mm lens, which is an automatic focus, prime lens. I got as close to the subject as I could, which was about 10″ (click to enlarge).

Read More
Yesterday I visited a nearby beach, and while I was mostly taking pictures with my DSLR, I also took a quick snapshot of the sunset with my phone. I posted it to Facebook, and many of my friends liked it. Here is the image I posted:
I came home with a few pictures that I wanted to post-process. I browsed through the images and chose some that 1. I thought had a good composition, 2. the water looked silky and pleasing, and 3. had both nice clouds and cloud reflections. Here are the two images in their original, RAW format (if you are used to seeing only jpg-s, these images will probably look really blah to you – and I agree; they are. RAW image files must be post processed.)
I chose two originals to create one final image, because I preferred the sky in the second one, but everything else in the first one. I composited them.
Read More

Picture

Ricardo Breceda’s Steel Horses in Borrego Springs, CA. Image by Gizella Nyquist

I’d like to talk about  something new I’ve tried.
Last weekend I attended a photography workshop organized by the California Center for Digital Arts. The main goal of the workshop was discovering the remains of a once very popular recreational area, the Salton Sea in California, and capturing the decay of natural and manmade items around the lake.
The most exciting part of the weekend for me was trying out nighttime and light-painting photography. In fact, the absolute highlight was seeing the billions of stars above my head in every direction. I live in a city, where it is impossible to view the stars the same way as you can far away from civilization.

Since this was my first attempt to capture light-painted objects and the night sky on my photographs, and I feel pretty successful with the results, I wanted to share my thoughts and recommendations about it. I’m hoping to inspire and help out others who have never attempted doing this before, and would like to try it.
I will tell you what equipment I used and how I made these pictures, although you certainly don’t need to have exactly the same gear or even the same settings. They will just give you good starting point. To create the shown pictures I used

  • a Nikon d750 dslr camera,
  • a Nikon 14-24mm f2.8 lens,
  • a sturdy tripod,
  • and some flashlights.

In order to be able to capture the starry night, you need to find a location far far away from large, bright cities. We were in the Anza-Borrego Desert area, in a fairly – but not perfectly – dark place. All the participants set up their cameras facing one of Ricardo Breceda’s steel sculptures, an elephant. We started out by focusing on the sculpture (it needs to be lit up by a strong flashlight or car headlights for focusing). Then, we took a picture of the dark scene to capture the starry sky. It took a few trials to get a good base image, but here are my settings for the picture that I found acceptable:

  • ISO 400
  • 24mm
  • f/5.0
  • 30 seconds shutter speed.

When you have a base image where the sky has enough stars showing, you can start experimenting with the light painting. It will take a few tries to have your object painted the way you like it. Our instructor tried different flashlights (some with colors), for various amounts of time, and from all kinds of angles. I would suggest that first you light the object for about 10 seconds in total, which does not have to be done continuously. But do turn the light off before you move to a new area, otherwise a light streak will show on your image. Check the picture and decide, if you want to light the item more or less, or maybe at different spots. There is no perfect recipe; it’s a fun trial and error process. Here is a set of pictures from the first attempts:

And here is the attempt that produced the best image for me:

Elephant statue (by Ricardo Breceda) lit by blue flashlight

Next, we moved to a new statue. Here, my camera settings were:

  • ISO 640
  • 16mm
  • f/5.0
  • 30 seconds shutter speed.

There were two images that I liked and I combined them in Photoshop. The result:

Picture

Light-painted horse sculpture (by Ricardo Breceda)

​My last and most favorite image was created differently. This is not light-painted, it is a silhouetted picture of the horses with the Milky Way showing in the background. You still need to light the object in order to manually focus on it, but then you need darkness. The settings for this image were:

  • ISO 4000 (try different high ISOs)
  • 17mm
  • f/5.0
  • 34 seconds shutter speed. I used the bulb mode and counted.

The final touches were done in Lightroom and Photoshop, and I also used Perfect Effect 9. Here is my most favorite image of the night:

Picture

Nighttime photo of Ricardo Breceda’s steel horses in the Borrego Springs area with the Milky Way in the background.
As a first timer in light-painting photography I have to tell you, that this was super fun to try, and I hope you will enjoy experimenting with it as much as I did.